I received a Cricut Maker Machine to test and review the new rotary blade along with the new fabric cutting mat. Of course I made a quilt. And this bundle of Up Parasol designed by Heather Bailey was just asking to be something fabulous.
I chose a free pattern from Cricut. The Half Hexi Quilt pattern. I changed the pattern just a bit - I matched up the blocks to form a full hexi instead of the stripe pattern design.
Instead of a pros and cons list I made a loved and watch out for list. Note - You can see a bit of the original Half Hexie quilt pattern in the picture below.
What I loved:
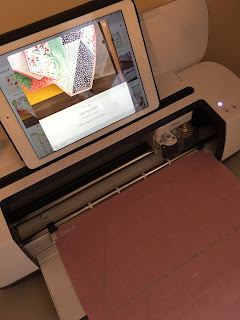
- Syncs up with my iPad. No toting around a lap top! There is a groove in which to place your iPad and you can use that screen to direct your fabric cuts. So easy to use. Allow time for setting up and syncing your devices.
- Accuracy. Perfect quilt block cuts. Great for those odd shapes! The hexi blocks I cut had the corners of the triangle trimmed - which if you are a quilter you know is pretty wonderful. Thank you Cricut designers. No guessing or overlapping triangle points hoping the seams will match up. The cut corners matched up perfectly.
- I can do other tasks while the Cricut Maker machine cut my blocks. I was pressing the next piece of fabric while my machine was cutting blocks. Slick!
- I made my quilt a throw size instead of a baby quilt. So easy. Just figure out how many more blocks you need and cut more. Cricut made this easy. You select which blocks you are cutting, add more fabric, and re-cut that block. Just a finger press!
- The pattern has a printable pdf with instructions as well as a step by step on your device/laptop. Watch for instructions like should the fabric be face up or down.
What to watch out for/Helps:
- I had one set of blocks that didn't cut correctly. Make sure that you set the mat in the machine correctly. I'm guessing this was my error. Maybe I became a little too confident and wasn't watching. This wasted a piece of fabric.
- You do need to be near the machine to push the buttons and feed it new fabric. But you will have time to press or stitch a few seams during the cutting process.
- The mat had enough fibers on it that it will need to be cleaned after each quilt project since you are cutting so many blocks. I even had to scrape it down about half way through the project. If you get too many fibers then your fabric will not adhere. The cleaning tips can be found on the internet. I also flipped my mat around since I noticed there were grooves from cutting so many of the same images. This helped. You can see below the outlines of the blocks I cut. Cleaning should remove these lines.
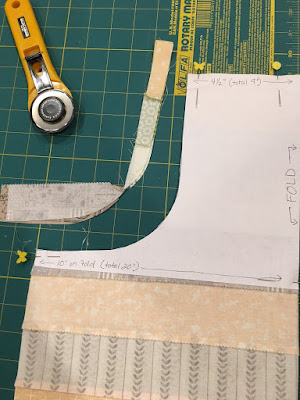
- There will be a little fabric waste. After I cut the first blocks, I knew I could cut my fabric short 1/2" in length to waste less fabric. Save the scraps though for another scrappy quilt.
- Also, important! The fabric can hang off the mat when you cut your pattern. This will create less waste. You may need to hold it lightly or let it drape on the table. See below.
- Follow the yardage requirements in the pattern. I had already purchased fat quarters and so I needed to cut fabric squares to fit the mat. If I had planned ahead, I would have purchased the cuts required. This would have made the cutting easier and there would have been less waste.
- You do need to pay for most of the available patterns. There are more and more designs appearing in Cricut Design space weekly and also from Simplicity which is great! I plan to make my granddaughter a romper next.
I had a great experience with the new Cricut Maker. My favorite thing was the accuracy of the blocks and (once set up) how easy the machine is to use. And it makes several wonderful items - go check out the menu!
And the lovely finished quilt! Quilting was done by Leisha of Quilting It.
click here to purchase or find out more about Cricut Maker
Happy Sewing!
If anyone has any experiences sewing with the new Cricut Maker, please send us your comments.


