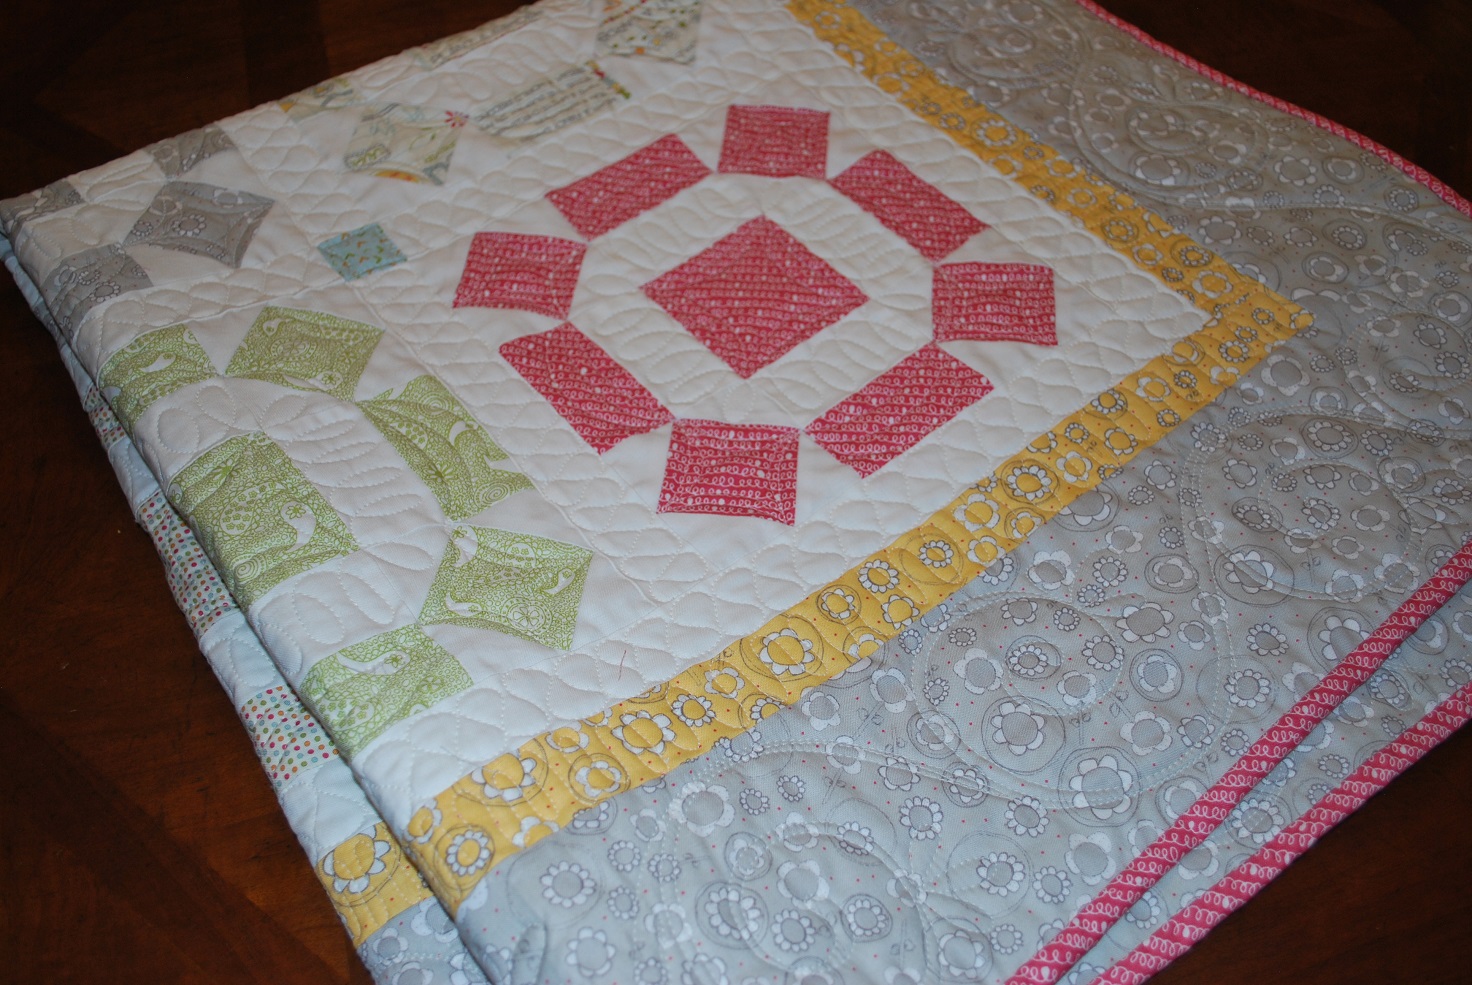
Wednesday, July 10, 2013

FINAL APPLE PIE IN THE SKY QUILT ALONG BLOCK 13

 THE LOST SHIP

It is just a coincidence that this is the last block. We have made so many half-square triangle blocks! In fact I thought maybe we should have called this the half-square triangle challenge.  I wanted to alternate types of blocks so you didn't get weary of the same type of square so I kept saving this block.  The Lost Ship reminds me of the Bear Paw Quilt Block.
You may have each large triangle a different print, all the same print, or use two prints like I have done.  As I laid out the quilt blocks, I realized that I had not used much of the main print from my Avalon collection.  You may wish to lay out your blocks and decide which fabrics or colors you need most.  I think this would also make a fun patchwork block - each half-square triangle a different print!

 Cutting Instructions:

  • Cut 10 white/background squares measuring 2 7/8" square
  • Cut 10 print (green) squares measuring 2 7/8" square
  • Cut 2 white background squares measuring 4 7/8" square
  • Cut 2 print (red) squares measuring 4 7/8" square OR  4 large triangles with the the two right angle sides each measuring 4 7/8"

Draw a diagonal line on each of the large white/background 4 7/8" square.  Match each white/background square to one of the large 4 7/8" print squares with right sides together.  Stitch a 1/4" seam away from each pencil line. Stitch down each side.  Click on the picture for a better view to see the sewn seam.  Cut along the pencil line.  Press seams towards the darkest print.
 OR if you are making each large half-square triangle a different print, then sew each triangle to a white/background triangle using a 1/4" seam along the longest edge, forming a half-square triangle.  Press seams towards the print.

Large half-square triangles will measure 4 1/2" square.  Trim off any excess and the dog ears.  Remember to use the 45 degree diagonal lines on your ruler to make sure your squares are 4 1/2" square.  The seams should be centered to the ends of the corners.  This will give you a more perfect point when you stitch the squares together.  Set these four squares aside.

 LAST TIME!  Draw a diagonal line on each of the 2 7/8" white/background squares.  Match each white/background square to a print square and sew 1/4" seam away from each pencil line.  Just like before!

To save time chain stitch these together.  Sew along each side.  Clip threads separating each square.  With ruler and rotary cutter, cut along each drawn pencil line.  Press seams towards the print.

 Trim off dog ears and any excess.   Each half-square triangle should be 2 1/2" square.  You should have 20.
 Sew one corner of the block together first.  Line up the half-square triangles in this pattern.
 Sew the two sides together keeping the printed triangles in the same direction.  Then sew the three bottom half-square triangles together.  Press the seams toward the darkest print.
 Stitch the half-square triangle strip of two to the side of the large half-square triangle.  Press the seam towards the large half-square triangle.
Then attach the bottom strip.  Wait to press this last seam.  Make 3 more blocks like this.  Each block should measure 6 1/2" square.
 Arrange each of the four blocks into the Lost Ship pattern.   Sew the two top blocks together, after pressing the bottom row seams in opposite directions. Repeat with the bottom two blocks.  Press each of those seams in opposite directions.  Then stitch the two strips together pressing the final seam towards the base of the block.  Large block should measure 12 1/2" square.   True up your block.
And last but not least......      THE LOST SHIP QUILT BLOCK

Now for the fun


Congratulations again to  Jeanenne

Winner of a $10 gift certificate to Sisters & Quilters! 

( Winner picked using the Random Number generator - this week winner number 3)


Ansje's Garden Patch Block.  Nice block!  Can I say those little teapots are so fun in the corner squares.


Leisha's Garden Patch Block.  Leisha - I liked how you handled the stripe in the tulip portion of the block.  So pretty!

 Jeanenne sent in two blocks this week.  First is the Garden Patch with some fun chevrons and stripes.
Next is Jeanenne's Pin Wheels.  I love the little chevron print in the pinwheels.  How fun is this!  A great mix white the large floral.  

Michelle just joined us last week and has sent us several blocks.  First is her Garden Patch.  Notice how she used prints for the center squares which gives the Garden Patch a new look.  Love this!  Scroll down through Michelle's next blocks.  You will love them.  Michelle is using fabrics from Lakehouse Drygoods.

 Michelle's Basket of Flowers
Michelle's Bears Paw
Michelle's Yankee Puzzle 
And here is her All Hallow's Block
What a beautiful Blueberry Pie Block!  Love the fussy cut rose in the center.
Another fun rose in the center.  Beautiful Key Lime Pie Block!  Thank you Michelle for sending in your pictures.  Can't wait to see these all put together.

Next week....sashings, corner blocks and borders for the On Point quilt.   You can use the same sashing for vertical rows!


Leisha is making a quilt with the blocks in vertical rows.  She needs 20 blocks total - 4 x 5.  She is making some additional blocks that I thought you might like to see.  Can you see all the half-square triangles.  I am beginning to believe that the half-square triangle can be made into a million patterns.

Oh and must apologize.  I had a cutting error last week - I omitted 2 squares.  I have corrected the post so that anyone new will have the correct cutting instructions.  Always let me know if you see an error!
Happy Sewing !

Wednesday, July 3, 2013

APPLE PIE IN THE SKY QUILT ALONG BLOCK 12


Garden Patch

 This is one of my favorite blocks.  I love the white space in the center.  This block reminds me of tulips and spring.  You could make 4 blocks for a fabulous table topper.  Another option is to use a print for the white center squares, forming two complete tulips.  Read through the cutting options for the center triangle patches.  I have give you two options.

 Cutting Instructions:

  • Cut 10 white/background squares measuring 2 1/2" square
  • Cut 4 print (green) corner squares measuring 2 1/2" square
  • Cut 2 print (yellow) squares measuring 2 1/2" square
  • Cut 2 print (yellow) rectangles measuring 2 3/4" x 5 1/4"
  • Cut 4 print (red) squares measuring 2 1/2" square
  • Cut 2 print (red) rectangles measuring  2 3/4" x 5 1/4"
  • Cut 4 White/background 4 3/4" squares OR 1 strip 4 3/4" x 13"  for white triangles- read below for instructions of each

 First stitch those 2 1/2" squares together in units of two.   Match up one print square with one white/background square.  Press seams towards the dark print.  Then nestling seams together, sew the units together creating the four patches as shown above.  As you can see only the center patch has the same prints in the square. The other four patches will have one corner square print and one flower print.  It might help you to scroll up and review the entire block picture. Press seams to the side.  4 patch units should be 4 1/2" square. Set aside.
Option 1 for the large white/background triangles.  You may cut these separately out of one square or you may cut a row of them as shown below.  For a triangle from each square, mark the center point (2 3/8") at the top of a 4 3/4" square.  Draw a line to each corner.  Cut along this line.  Discard or save sides for another project. Cut 4 triangles.

For much less waste, cut the triangles all from one strip.   Align the 4 3/4" strip with the measurements on your cutting mat.  Make sure the left side is cut straight.  Draw a marking line at the base of the strip  at the 4 3/4" point.  
 At the top of the strip mark the center point of the first triangle which will be 2 3/8" across from the left.
Draw the sides for the first triangle.  First connect the bottom corner with top center and then bottom 4 3/4" mark with the center mark.   
Next draw the remaining 3 triangles.  Use your ruler for the next markings not your mat.  Note that my strip shifted.  Do not follow the markings on my mat! 
Begin with the first triangle top center marking and measure across 4 3/4". Mark with a pencil.  Measure across another 4 3/4" from the second marking. Mark again.  On the bottom of the strip, measure across 4 3/4" from the first triangle right corner marking.  Mark.  Draw diagonal lines connecting the markings, forming four triangles.  Remember measure twice cut once  :)  Cut directly on the lines. 


 Place the same print 2 3/4" x 5 1/4" rectangles across from each other on your mat.   Cut each rectangle on the diagonal exactly as shown using your rotary cutter and ruler.  Notice that each rectangle must be cut in opposite directions.
Match up the cut rectangles with the large triangles.  The wide top of the cut rectangles should be even with the top of the triangles.  Let the narrow points of the cut rectangles extend below the triangles. 


Sew one cut rectangle to the side of the triangle, matching the top points.  Use that 1/4" scant seam!  Just let the "tails" extend below the triangles.  Press the seams towards the dark print. 
When sewing the second cut rectangle, match up the points at the top first.  Sew.  Press the seams again towards the outside.  
 Trim off the dog ears.  This patch should measure 4 1/2" square.  Trim of any edges to square it up, making sure that the white triangle is centered in the square.  And you should have the 1/4" seam at the top - above the white triangle point!
 Arrange the squares into the Garden Patch Block.
 Sew the block together in rows first.  Press the 1st and 3rd row's seams towards the four patch squares.  Press the center row seams towards the center.   Sew the rows together.  Press the seams towards the center for less bulk.  The block should measure 12 1/2" square. HINT When I am matching triangle points and seams, I first pin where I want them to match,  and then baste in place with a long machine stitch - just an inch or to to hold it in place.  If it doesn't match, then I only have to unpick the inch of stitches and try again. 

The beautiful Garden Patch Block


Now for the fun


Congratulations again to  Leisha

Winner of a $10 gift certificate to Sisters & Quilters! 

(Winner picked using the Random Number generator!)
 Leisha's Pin Wheels.  I love the soft beige floral in the plain squares.  It really makes the white and navy pop in the pin wheels.


Ansje's wonderful Pin Wheels Block.  Love the black pin wheels!  Very striking!


 Welcome to Michelle who is just joining us.   Beautiful fabrics.  We would love to see some of your other blocks!  Please send them in!

Leisha created an additional block.  Can you see all the squares and half-square triangles?  You should all know how to make this block. This block is a great alternative.  This is a 12 1/2" unfinished block (will be 12" finished).  Can you see there are 6 squares across? That means those half-square triangles will be 2 1/2" unfinished - so cut the squares 2 7/8".   Have I taught you how to measure those?  It is easy.  When you want to make two half-square triangle out of two squares, just add 3/8" inch to your measurement.   So if you need a 2 1/2" unfinished square for a block (that is 2" finished/completed) -  just add 3/8" to 2 1/2" = 2 7/8" square.

If you are just joining us CLICK HERE for the beginning Apple Pie Block!

Happy Sewing!

Monday, July 1, 2013

Fabulous New Quilt ideas!

 This adorable little guys quilt was made by Leisha Farnsworth.  The pattern is a smaller version of Thimble Blossoms' JellyBean pattern. We have this pattern on order and it will be in stock soon.  Leisha combined Camille and Bonnie's Vintage Modern and Happy Go Lucky fabric collections.  I also see a little of Riley Blake's Willow grey herringbone in there as well.
 Love the Snickerdoodle on the back.   Perfect with the Happy Go Lucky Jump scallop stripe binding.
 Lotta Jansdotter fabric collections have always been a favorite of ours!  Leisha combined the Glimma and Echo yellow and greys for this beautiful quilt.  Those huge diamonds are back-to-back finished 8" triangles.  Leisha also added AdornIt Vinatge Grey Circles and RJR Doodle Zoo Diamond yellow dots - a perfect match with the Glimma collection.
 We always like to see what is on the back.  We love the Cuddle Minky here in the cold climates in norther Utah.
 Another wonderful quilt made by Leisha.   This favorite X's and O's quilt was made with charm packs from the Mama Said Sew Collection by Sweetwater.  The cream with the grey dot is Vintage Modern.
 Thanks Leisha for sharing your projects!  Leisha is always doing something wonderfully creative.  You can see all these quilts - AND LOTS MORE on Leisha's Quilting It Facebook page.  CLICK HERE to visit her page.  You will want to scroll through her albums.  


Jerilyn Lawson has made this beautiful Valentine Quilt using Sandra's Hearts, Hearts, Hearts  Pattern.   If you look close, you can see the hearts are formed from triangles.  Lots of work! This turned out wonderful Jerilyn!

 Flower Punch was designed by Kristin using the traditonal Broken Wheel or Rolling Stone Quilt Block.
This quilt was made with the sweet Noteworthy fabric collection by Sweetwater.  This is a square baby quilt pattern - perfect to wrap around your little one.
We love stripes on the bias for binding.  This little Fly A Kite print is already on the bias for you!
 One of our favorite new modern collections is  Urban Mod by the Art Gallery In House Design Studio.  So fun and easy to take these modern collections and use them in traditional patterns.  We would be happy to set up a custom listing for you if you find a modern collection you would like to use.


Sandra's This Way and That Quilt has been a hit.  We are expecting another shipment this next week of Cat in the Hat Celebration fabrics so that we can continue these kits.  And....
we have worked this up in the Urban Mod  Collection to show you how fun this quilt pattern can be with some of the modern collections we have in stock.  

What else is new at Sisters & Quilters?
Happy Go Lucky Fabric Collection and Quilt Kits by Bonnie and Camille 


All A Flutter Quilt Pattern and Kit designed by Bonnie Olaveson of Cotton Way. We love this bright fresh vintage quilt pattern made with the Happy Go Lucky fabric collection.  Pictures courtesy of Bonnie.  Get well Bonnie!  QUICK LINK CLICK HERE

Topsy Turvy Quilt Pattern and Kit designed by Bonnie Olaveson of Cotton Way.  This is a charm pack quilt!  We love these pre-cuts patterns!   CLICK HERE for this quilt kit


 Juggle Quilt Kit designed by Camille Roskelly of Thimble Blossom featuring the Honeycombs in the Happy Go Lucky Fabric Collection  QUICK LINK CLICK HERE .  Pictures above are courtesy of Camille.  Thanks Camille!

Round & Round Navy Blue Quilt Kit designed by Camille Roskelly of Thimble Blossoms. This is a charm pack quilt pattern.  How fun is that!

 We offer kits in the Navy or White dot background.  Quick Link CLICK HERE
 Fireworks is another one of our favorite quilt kits.  Quick Link CLICK HERE


Lots of fun summer projects!