For those of you just joining in, this is our Halloween Quilt Along. This pattern was designed by Kim of Kimberbell Designs. She has wonderful instructions and lots of pictures. You will enjoy this pattern. Quilt kits are available in our shop! You will need to purchase your own personal pattern for the dimensions and specific instructions.
This quilt pattern will boost your quilting and sewing skills! I highly recommend it!
Today I am working on part 6 of the quilt - the pumpkin patch block. This is a great applique practice!
Lots of pictures so I will keep the commentary to a minimum.
Bag contents for this project. Included are 6 orange fabrics for your pumpkins - extra to give you a choice.
I laid the orange squares on the background to decide color placement. My first choice was the brighter oranges but then I remembered I need to add some bright Yo-Yo's so I opted for the top placement.
Prepare applique pumpkins using the same method as in week 2
(Link click here if you need it) REMEMBER to peel off the paper backing of the fusible web before figuring out placement. I forgot and had to redo the placement - just when I had it perfect too. At least I remembered before pressing!
Pressed in place. As you can see they overlap just a smidge. Don't you love the houndstooth print?
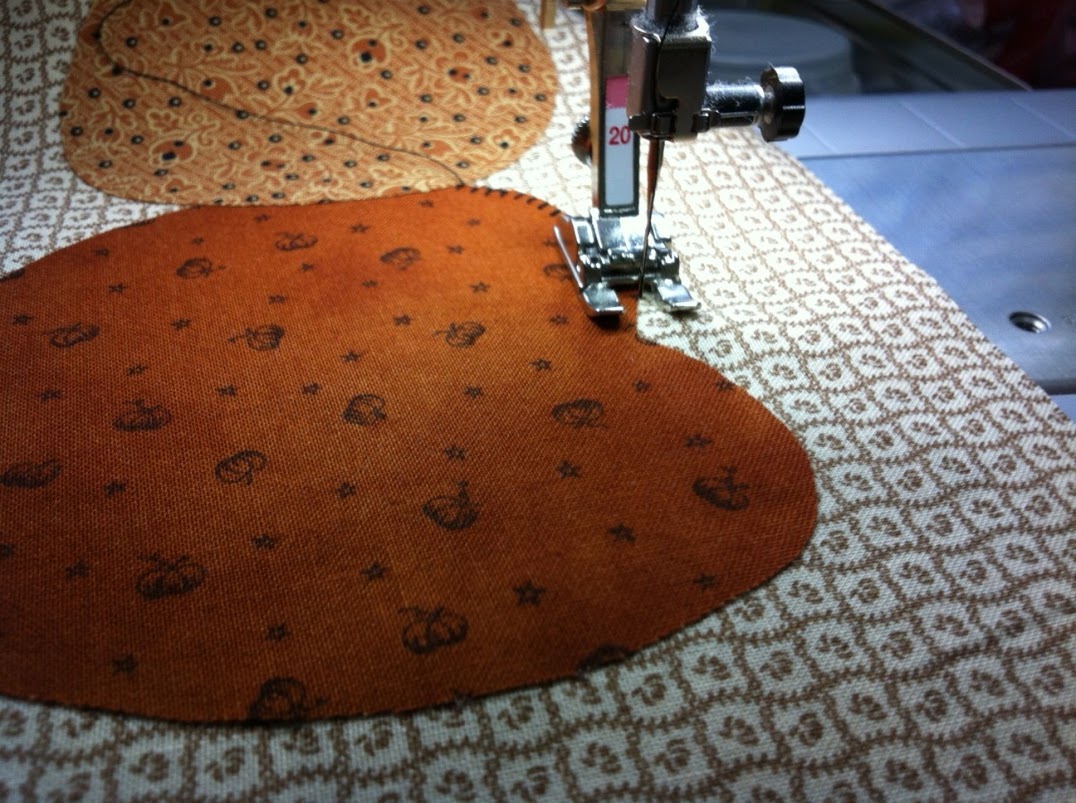
Begin the applique with the left pumpkin - or the pumpkin that is being overlapped. I began stitching in the corner near the overlap so that I could blanket stitch in a continuous circle. Stop where the next pumpkin overlaps. Notice I remembered to use the open presser foot this time.
Pumpkin 2 - Can you see I am beginning in the corner again and I will stitch over the dark orange pumpkin.

Up close shot. This project has been great practice for me!
Back of my applique. I never show the back. At the end of my applique, I
raised the needle, switched to a straight stitch, and back-stitched two stitches since the end pumpkin does not have an overlap to hide or secure the end stitches.
YO-YO time! I have never made a yo-yo. This is my new skill builder for the day. First find a cup or lid to make your circle pattern! I found a large paper cup that was the same size as my pattern - lucky me. Just trace the circle on the orange fabrics. Again, think about color placement. I made sure that the colors I chose would be different that the pumpkin they would be next to. It might be fun to raid your stash and use a dark gold color.
With needle and thread, hand gather the raw edges. I stitched close to the edge of the circle and my stitches are about 1/4 inch long.
Use the Ric Rac for the pumpkin stem. I folded the small stem in half lengthwise and secured it in the opening of the Yo-Yo.
Oh, last but not least. I wasn't sure what to do with the stems. The pattern said to straight stitch them in place so I followed the edges and I have a little triangle in each one!
Please send us pictures when you are finished. Some are coming in now! We will post them soon.
Happy Quilting!


I love this creation! It's such a great idea to make something new.Thanks for sharing your ideas.
ReplyDeleteSyncVisas