Ever since I spotted the Spring House Layer Cake Free Quilt Pattern by Moda Fabrics I have wanted to make this quilt. I loved that all I needed was a Layer Cake and some background yardage. The design team at Moda Fabrics has some wonderful free patterns. You may download this pattern and use their instructions or follow the ones below. I made my flying geese blocks a larger size and I used a different method. Here is the link to the Spring House Free Pattern
My son-in-law's sister and her husband climbed Mt. Kilimanjaro. For a wedding gift I decided to make them a quilt with something to resemble a mountain. I thought this pattern would be perfect.
I prefer to make my flying geese blocks with the no-waste four-at-a-time method. The blocks sew up so much faster and more accurate. All seams are 1/4".
First grab your favorite Layer Cake. I chose Persimmon by BasicGrey for this quilt.
Next - Decide on your finished quilt size.
I always make one block first to make sure the calculations are correct. Please make one set of flying geese before cutting the remaining squares to make sure the calculations are correct.
Using the chart above decide on the size you need your print square to be. I finally decided on a finished flying geese block of 3.5"x 7". I trimmed my print squares to 8 1/4".
(At first I wanted a larger flying geese block and first trimmed it to 9 1/4". THEN I calculated how big the quilt would be and decided I needed a smaller finished quilt. And yes I saved the strips for another project.)
Also using the guide above, find out what your background squares size needs to be. With a pencil and ruler draw a diagonal line on each of the 160 squares, from corner to corner. Yes put on your favorite movie.
Then place 2 of background/white squares on each printed Layer Cake square. Notice how the pencil lines match up forming one diagonal line across the Layer Cake square. The background squares will overlap. Repeat this for all 40 squares. Set aside the remaining 80 background squares.
I pulled 2 squares to show you the next few steps. Stitch a 1/4" seam alongside each drawn pencil line. Stitch a seam line on both sides of the drawn pencil line.
Here is a close up of one of the squares. Sew all 40 layer cake print squares in this manner.
Using a rotary cutter, cut each square directly on the pencil line. Press each triangle open with the seam towards the background triangles. You will have 2 heart shaped units from each square.
On each of the two heart sections, place a background square with the pencil line running up the center of the triangle. Stitch 1/4" seams alongside each pencil line.
Rotary cut along the pencil line. Separate the sections. You now have 4 flying geese blocks. Press seams towards the top and trim of those dog ears. Repeat this process with all 40 Layer Cake squares. You will have a total of 160 flying geese blocks.
Remember - Your flying geese blocks will be 1/2" wider and taller than your finished block listed in the guide above. This is for the seam allowance. Correct any flying geese that may have been a little "wonky". I always "true up" my blocks before sewing them in rows.
Now the fun! Arrange your blocks into the pattern you choose. 8 rows of 20 blocks. I really liked alternating the direction of the flying geese. And I liked the idea of having all four of the same prints together creating a stripe effect. My husband preferred the random arrangement of the blocks - I liked that too. But since I am making the quilt I get to choose. :)
I added 5" borders to the sides of this quilt top. Border strip measurements are 5" x 70.5".
Since the top was already 70" long, I just wanted to make the quilt a little wider. You may choose to have borders on the top and bottom of the quilt. Or you may choose arrange the blocks in a different pattern creating a different size for your quilt.
Now off to my favorite quilter Leisha.
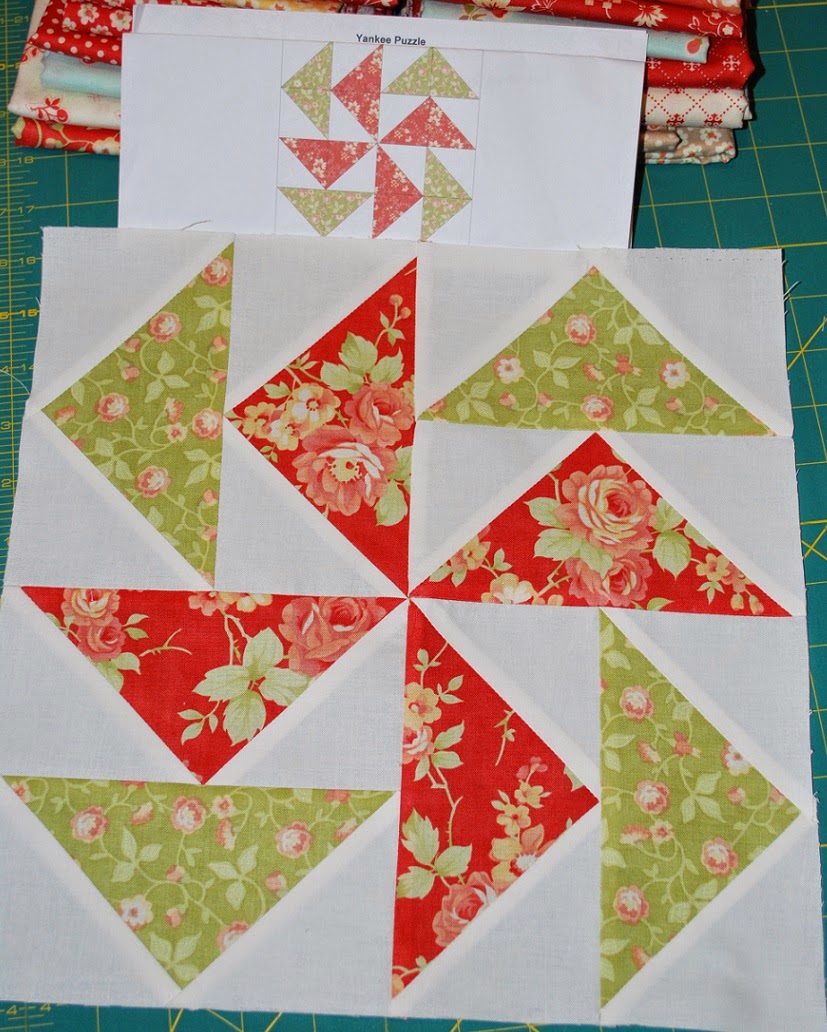
Be creative and have fun. You can arrange your flying geese blocks in a square pattern. Remember this Yankee Puzzle block from our Apple Pie Quilt Along:
This would work perfectly with the blocks you have just sewn because each square makes 4 flying geese blocks - exactly what you would need for this Yankee Puzzle Block. You need 2 prints per block. You could arrange them 4 rows x 5 blocks and have the same finished quilt measurement.
If you make a flying geese quilt, remember to send us pictures. We love sharing them on our blog sharing days.
Happy sewing and have a great weekend!
Kristin


I really don't enjoy making flying geese but this looks like a way I can handle. Thanks Kristen!
ReplyDeleteYou will really like making them by this method. So much faster. No more wonky flying geese.
ReplyDeleteI love the colours & layout for this quilt! Just like a mountain range...sorry drooling.
ReplyDeleteWhat is your background fabric?
Persimmon by BasicGrey. Thank you!
DeleteThanks! Is the background Bella Snow? Can't wait to start this.
DeleteThe background is Kona Snow. Bella snow will probably be too yellow. If you have Bella, I would go with a 9900 97. The 9900 97 will be a softer white color. Or the Bella ivory cream 9900 60. The ivory cream is very creamy.
DeleteThank you for the details. Will be cutting soon.
DeleteThis comment has been removed by the author.
ReplyDeleteWonderful Article Towel digitizing nicee
ReplyDelete